Creating Your First Project
A Project is the fundamental workspace in Kube-DC. It acts as a container for your applications, Virtual Machines, and Clusters, providing them with a dedicated, isolated network.
Prerequisites
- A Kube-DC Cloud account (Sign Up)
- Basic understanding of Core Concepts
Create a New Project
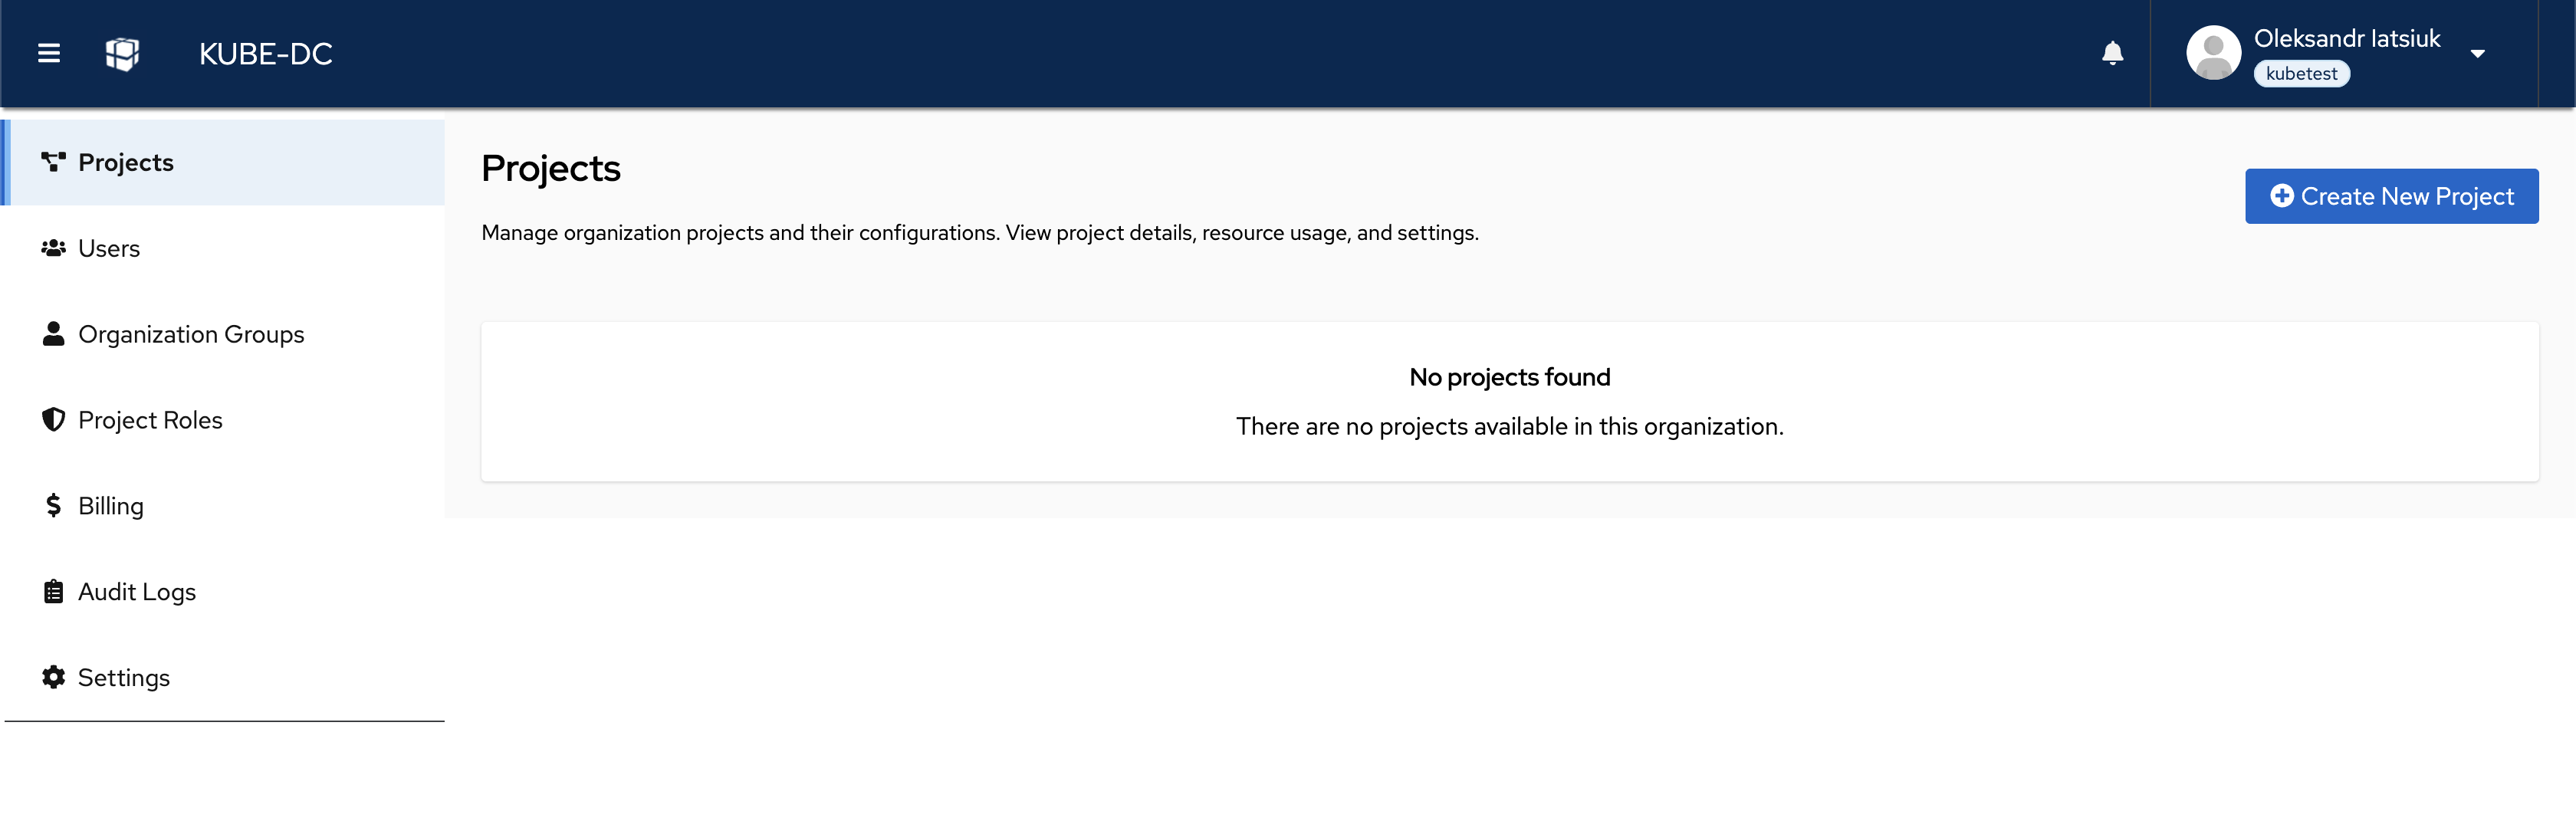
To start, navigate to the Projects tab in the main sidebar.
Click the Create New Project button in the top right corner. The creation wizard will appear.
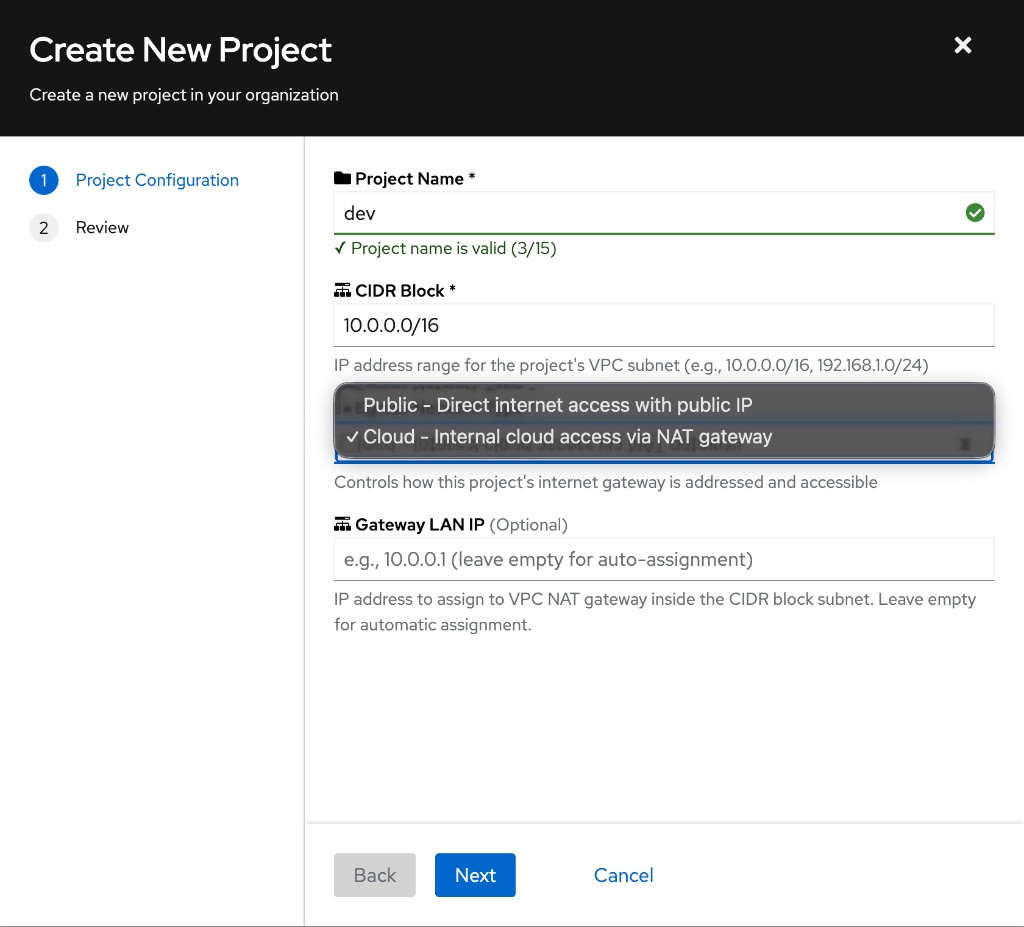
Configure Project Settings
In the Project Configuration step, define the basic properties of your workspace:
- Project Name — Enter a unique name (e.g.,
dev,staging,production) - CIDR Block — Define the internal IP range for this project's private network (e.g.,
10.0.0.0/16) - Egress Network Type — Choose how workloads in this project access the internet
Which network type should I choose?
| Type | Gateway | Use Case |
|---|---|---|
| ☁️ Cloud (NAT Gateway) | Private gateway IP (shared, more secure) | Web servers, databases, backend microservices, general cloud infrastructure |
| 🌐 Public (Direct Access) | Dedicated external IP (billable) | Direct port forwarding, dedicated load balancing, apps requiring a fixed public gateway |
Key difference: Both project types can expose workloads to the internet. The main difference is the gateway:
- Cloud — Your project gets a private gateway IP. Workloads access the internet through a secure, shared NAT. More cost-effective and secure for most use cases.
- Public — Your project gets a dedicated external IP as its gateway. This IP can be used for direct port forwarding or load balancing. The dedicated gateway IP is billable.
For most applications, choose Cloud (NAT Gateway). It provides better security, is more cost-effective, and is the standard approach for cloud infrastructure.
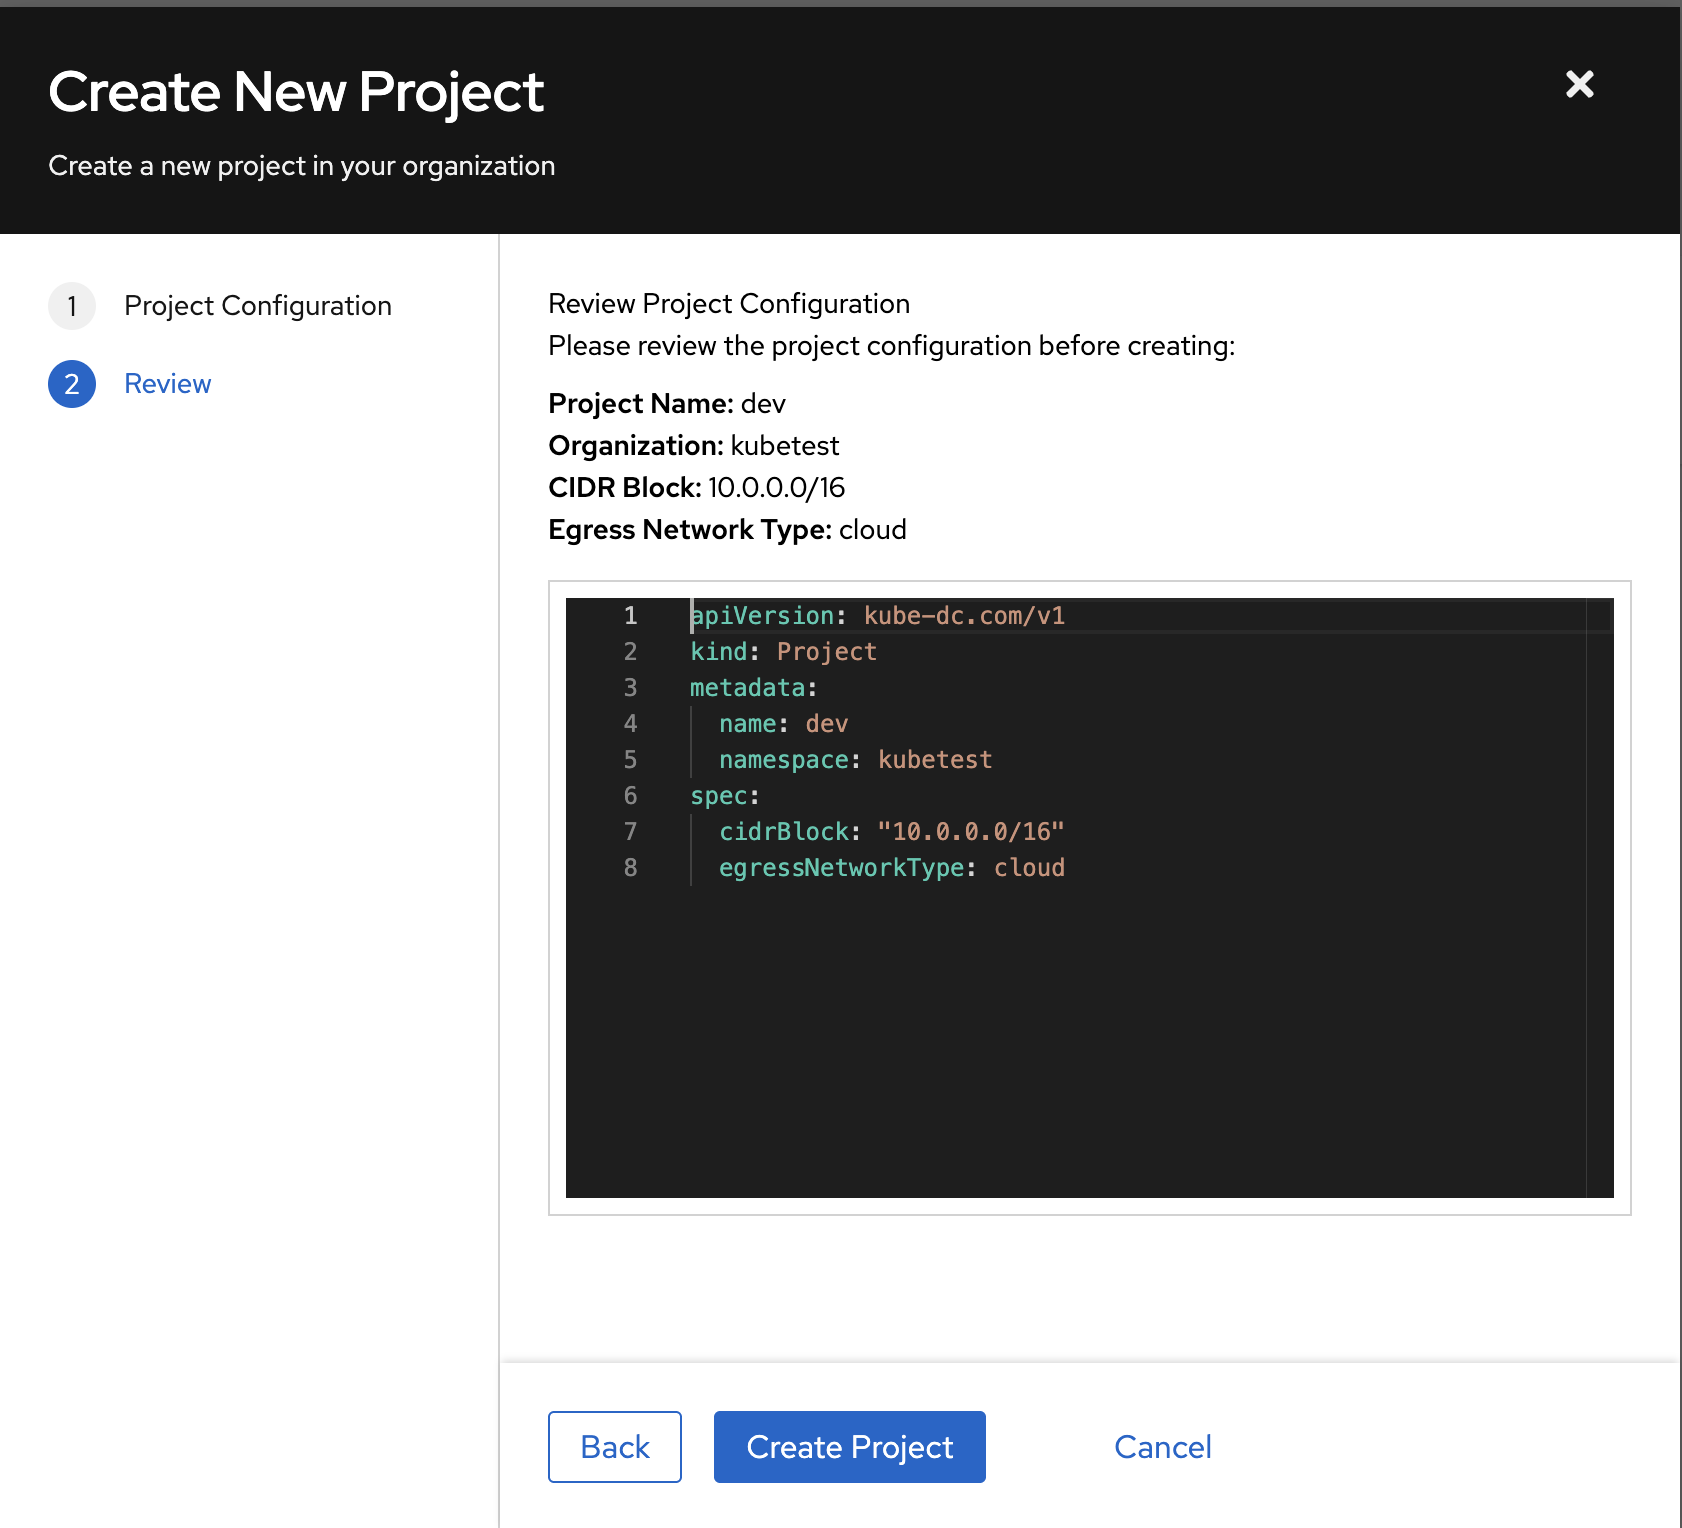
Review & Create
- Click Next to proceed to the Review step
- Kube-DC shows you the underlying Kubernetes Manifest (YAML) that will be applied — this transparency allows advanced users to understand exactly what is being created
- Review the configuration
- Click Create Project
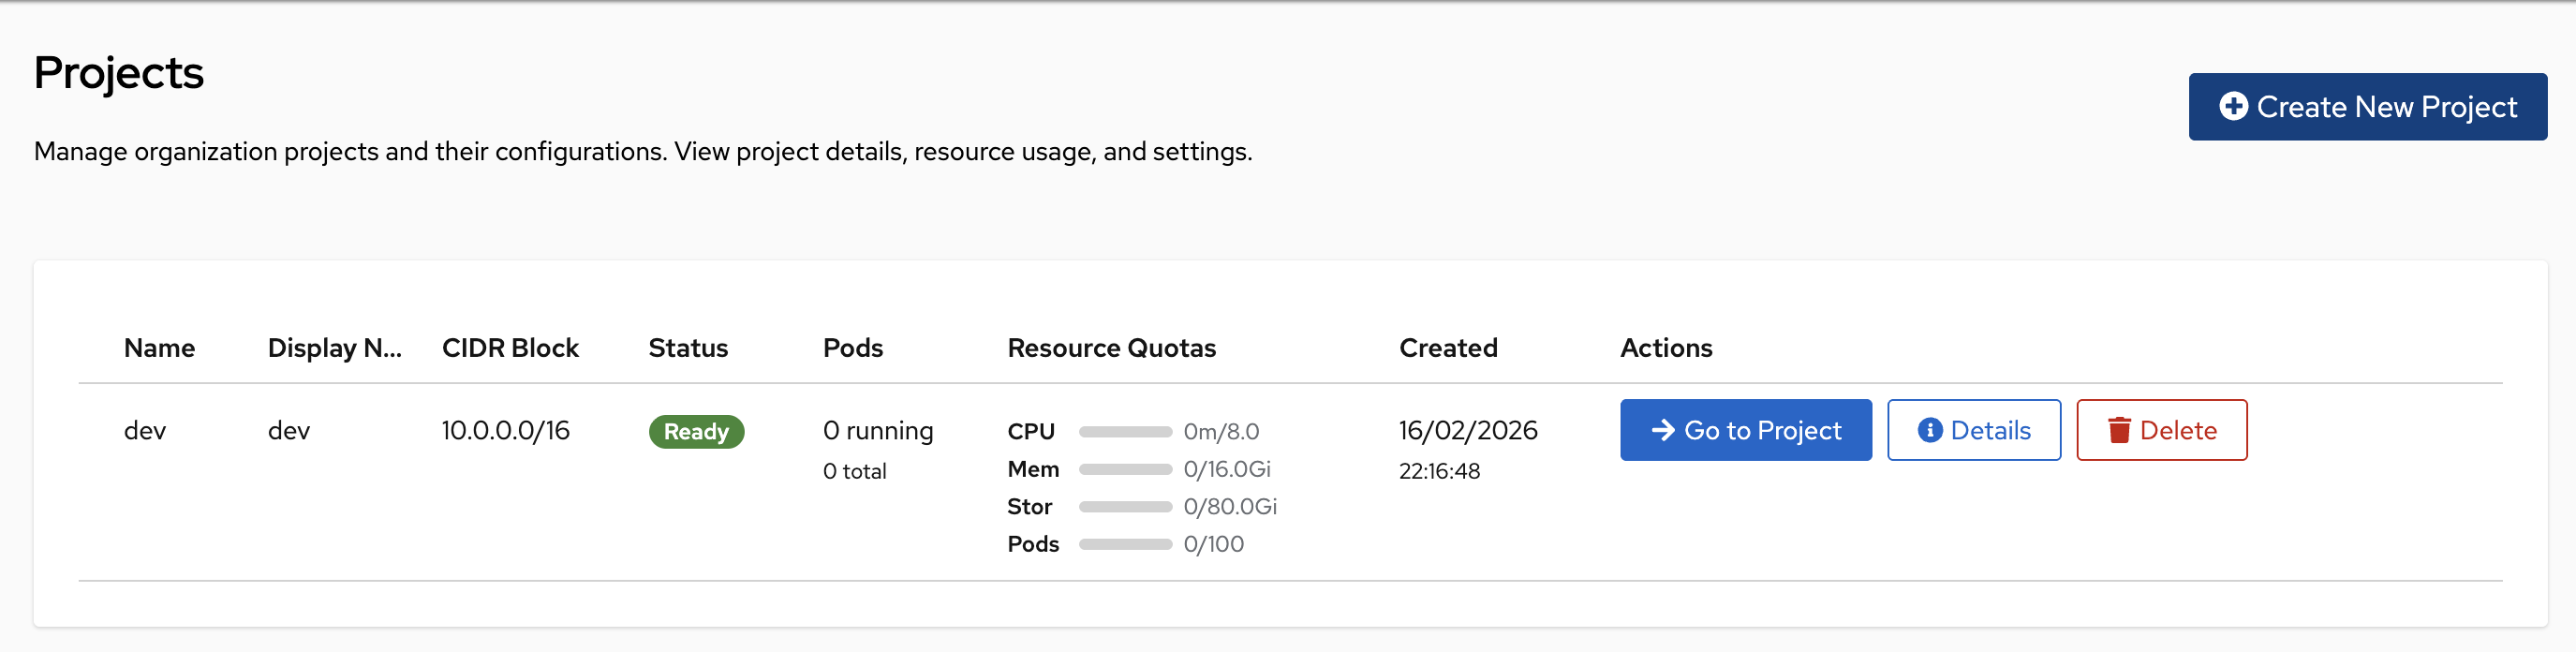
Once created, your new project will appear in the list with a status of Ready.
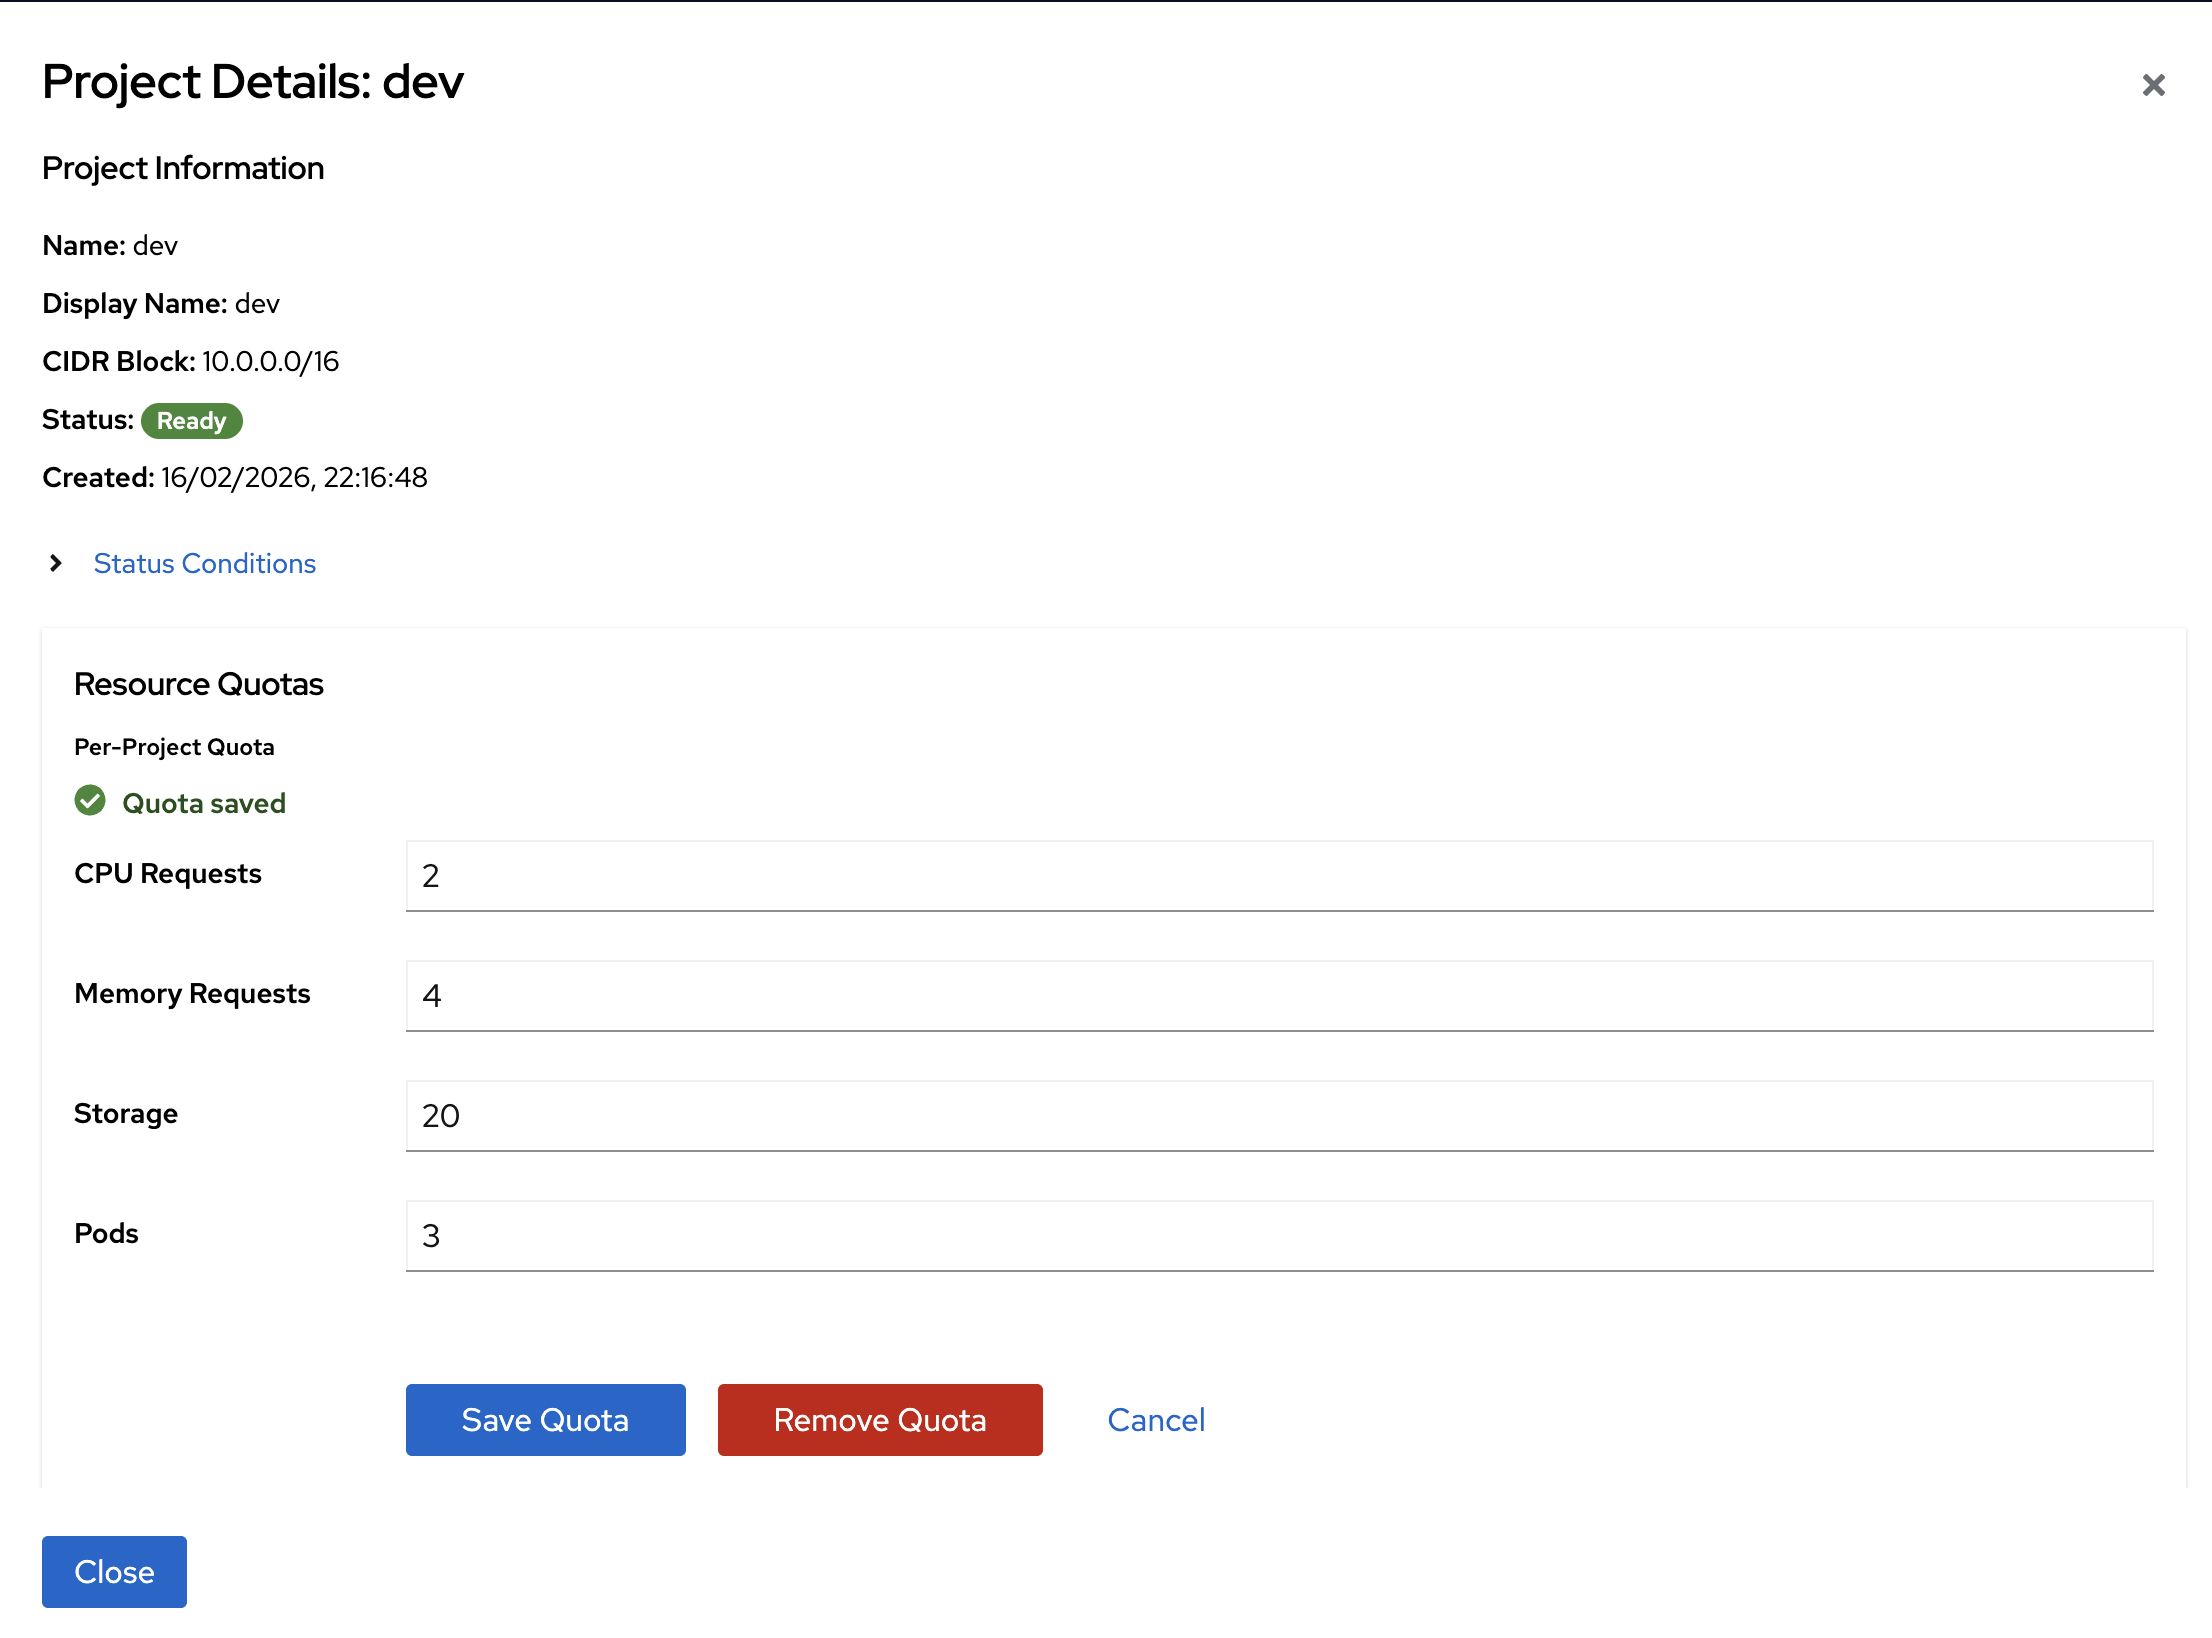
Setting Resource Quotas (Optional)
By default, a Project shares the full resource pool of your Organization. To prevent one project from consuming all resources, you can set specific limits.
- In the Projects list, click the Details button next to your project
- In the "Resource Quotas" section, click Set Quota
- Define the limits for this project:
- CPU — Max CPU cores
- Memory — Max RAM (in GiB)
- Storage — Max disk space (in GiB)
- Pods — Max number of containers
- Click Save Quota
Next Steps
Once your project is created: